Overview
In the Code First workflow:- Develop types and resolvers in your application code
- Generate the GraphQL schema from your code using your framework’s tooling
- Commit & Push the generated schema files to your repository
- Create a pull request with the schema changes
- Sync automatically triggers Hub to create a branch and proposal
- Collaborate using Hub’s visual tools and governance features
- Merge the PR once the proposal is approved
- Use code-first GraphQL frameworks (TypeGraphQL, Nexus, Pothos, gqlgen, Strawberry, etc.)
- Want the schema to be derived from implementation code
- Prefer working in their native programming language over writing SDL
- Have existing repository-based development workflows
- Require automated governance for schema changes
Prerequisites
Before starting, ensure you have:- A WunderGraph Hub account with an organization
- A graph created in Hub with subgraphs defined
- GitHub or GitLab connected to Hub
- Subgraph-to-repository mappings configured
- Two-way sync enabled for your graph
.graphql schema files by hand, developers define their types and resolvers using code—with classes, decorators, annotations, or type definitions in languages like TypeScript, Go, Python, or Java. The GraphQL schema is then automatically generated from this code.
This approach is popular with frameworks like TypeGraphQL, Nexus, Pothos, and gqlgen, where the schema is derived from your implementation. Developers work in their native programming language, and the tooling produces the corresponding GraphQL schema definition language (SDL) files.
Once the schema is generated, developers commit and push these generated schema files to their repository. From there, the workflow integrates seamlessly with Hub: when a pull request containing schema changes is created or updated, Hub automatically creates a corresponding branch and proposal. This bridges the gap between code-level development and schema governance, ensuring that every change goes through proper review and validation before reaching production.
Step-by-Step Guide
Step 1: Connect Your Repository
Connect your GitHub or GitLab repository to enable two-way synchronization.For GitHub
- Navigate to Settings → Integrations in your organization
- Click Connect GitHub
- Authorize the WunderGraph Hub application
- Select the repositories containing your GraphQL schemas
For GitLab
- Navigate to Settings → Integrations in your organization
- Click Connect GitLab
- Authorize the application and select your projects
Step 2: Configure Subgraph Mappings
Map each subgraph to its corresponding schema file in your repository.- Open your graph in Hub
- Click the dropdown in the top-left corner
- Select Integrations → Git
- For each subgraph, configure:
- Repository: Select the repository containing the schema
- File Path: Specify the schema file location
- Click Save Mappings
Step 3: Enable Two-Way Sync
Enable bi-directional synchronization to receive updates from your repository.- In the Git integration settings, locate the Two-Way Sync toggle
- Enable two-way sync for your graph
Two-way sync must be enabled for Hub to receive and process pull request webhooks from your repository.
Step 4: Develop Schema Changes and Create a Pull Request
- Create a feature branch for your changes
- Modify your application code to add or change types
- Generate the GraphQL schema using your framework’s tooling
- Commit both your code changes and the generated schema file
- Push to your branch and create a pull request
Step 5: Automatic Hub Synchronization
When you create or update the pull request, Hub automatically:- Receives the webhook from GitHub/GitLab
- Detects affected subgraphs based on your mappings
- Creates a Hub branch matching your git branch name
- Imports the schema from your pull request
- Creates a proposal for review, governance and validation
The Hub branch and proposal are created automatically—no manual action required. Team members will see the new proposal in the Hub interface.
Step 6: Review and Govern in Hub
Use Hub’s visual tools and governance features to review and collaborate on the changes.- Open the proposal in Hub
- Review visually using the canvas to see type relationships
- Check validations:
- Composition checks
- Breaking change detection
- Lint errors
- Operation impact analysis
- Collaborate using Hub’s discussion features to collaborate with stakeholders
- Governance:
- Require approvals from designated reviewers before publishing
- Ensure all checks pass before the proposal can proceed
- Track who reviewed and approved schema changes
Step 7: Iterate on Changes
Continue development in your repository. Each push automatically syncs to Hub.- Make additional changes to your application code
- Regenerate the schema using your framework’s tooling
- Commit and push both code and generated schema to your PR branch
- Hub automatically updates the corresponding branch and proposal
- Validations re-run with each update
Step 8: Approve, Merge, and Publish
Once the proposal passes all checks and is approved:- Approve the proposal in Hub
- Merge the PR in GitHub/GitLab
- CI publishes the schema to your registry (Cosmo or Apollo GraphOS)
- Hub detects the publish and marks the proposal as published
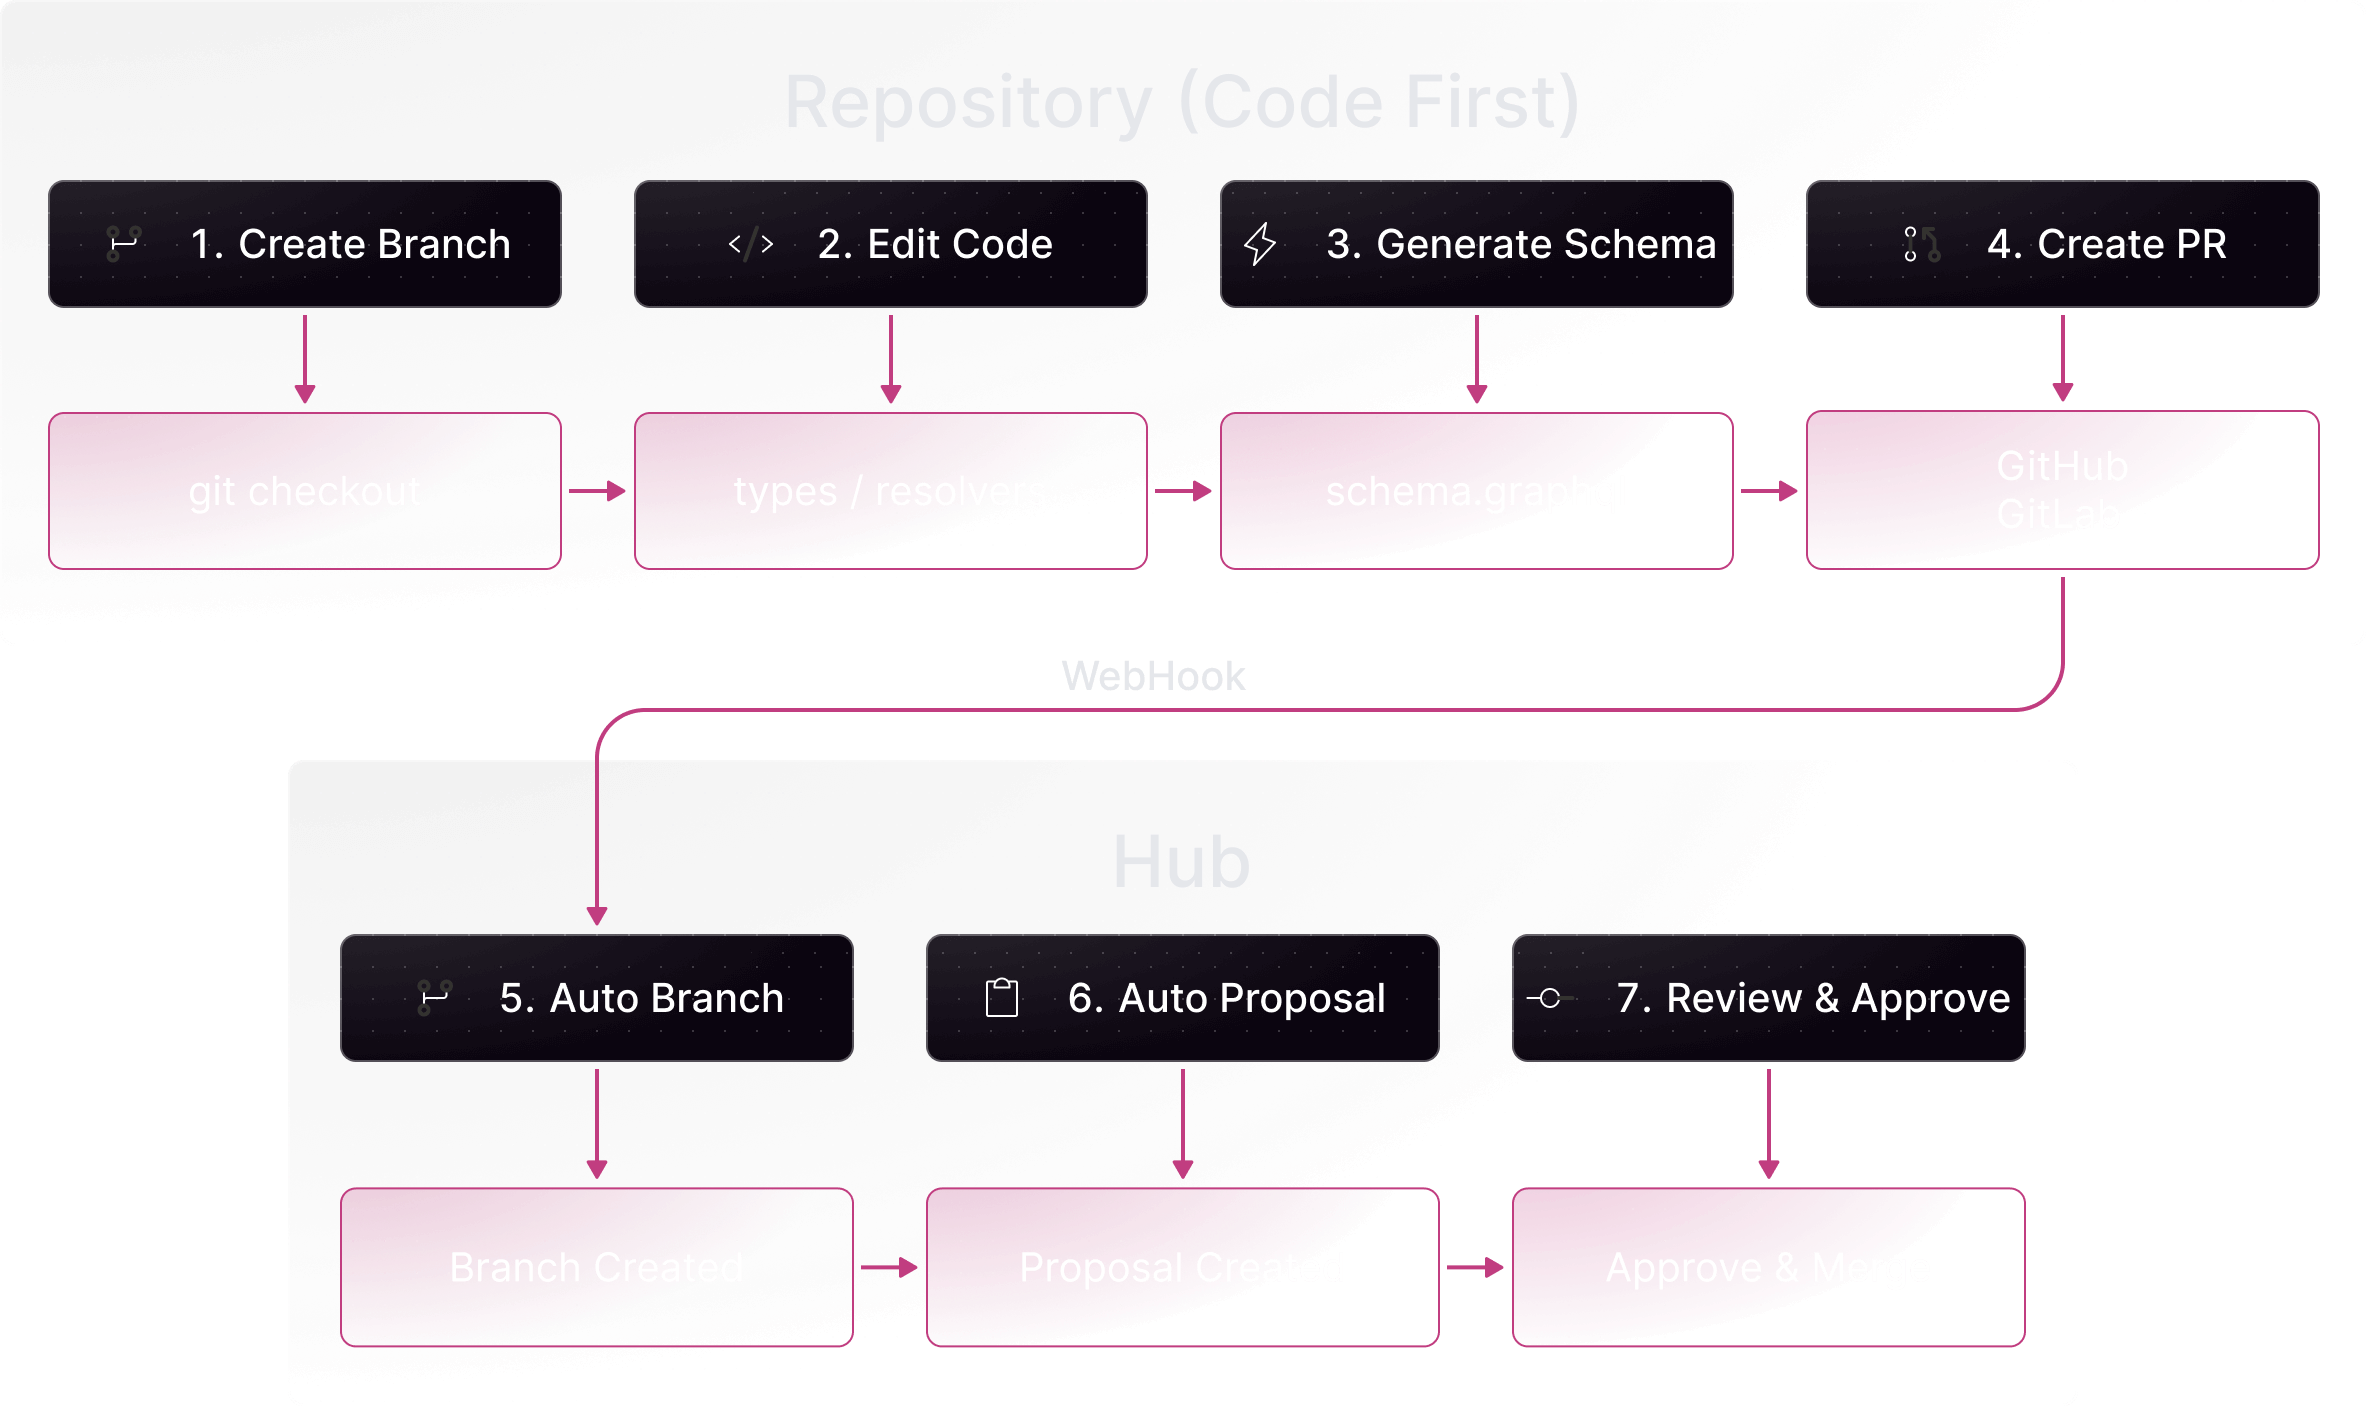
Workflow Diagram
Circular Sync Prevention
Hub automatically prevents infinite sync loops:- Schema Comparison: Before writing changes back to git, Hub compares the current schema with the incoming changes
- Identical Content Detection: If schemas are identical, no write occurs
- Edit schemas in Hub (changes sync to your PR)
- Edit schemas in your repository (changes sync to Hub)
- Both without creating infinite loops